
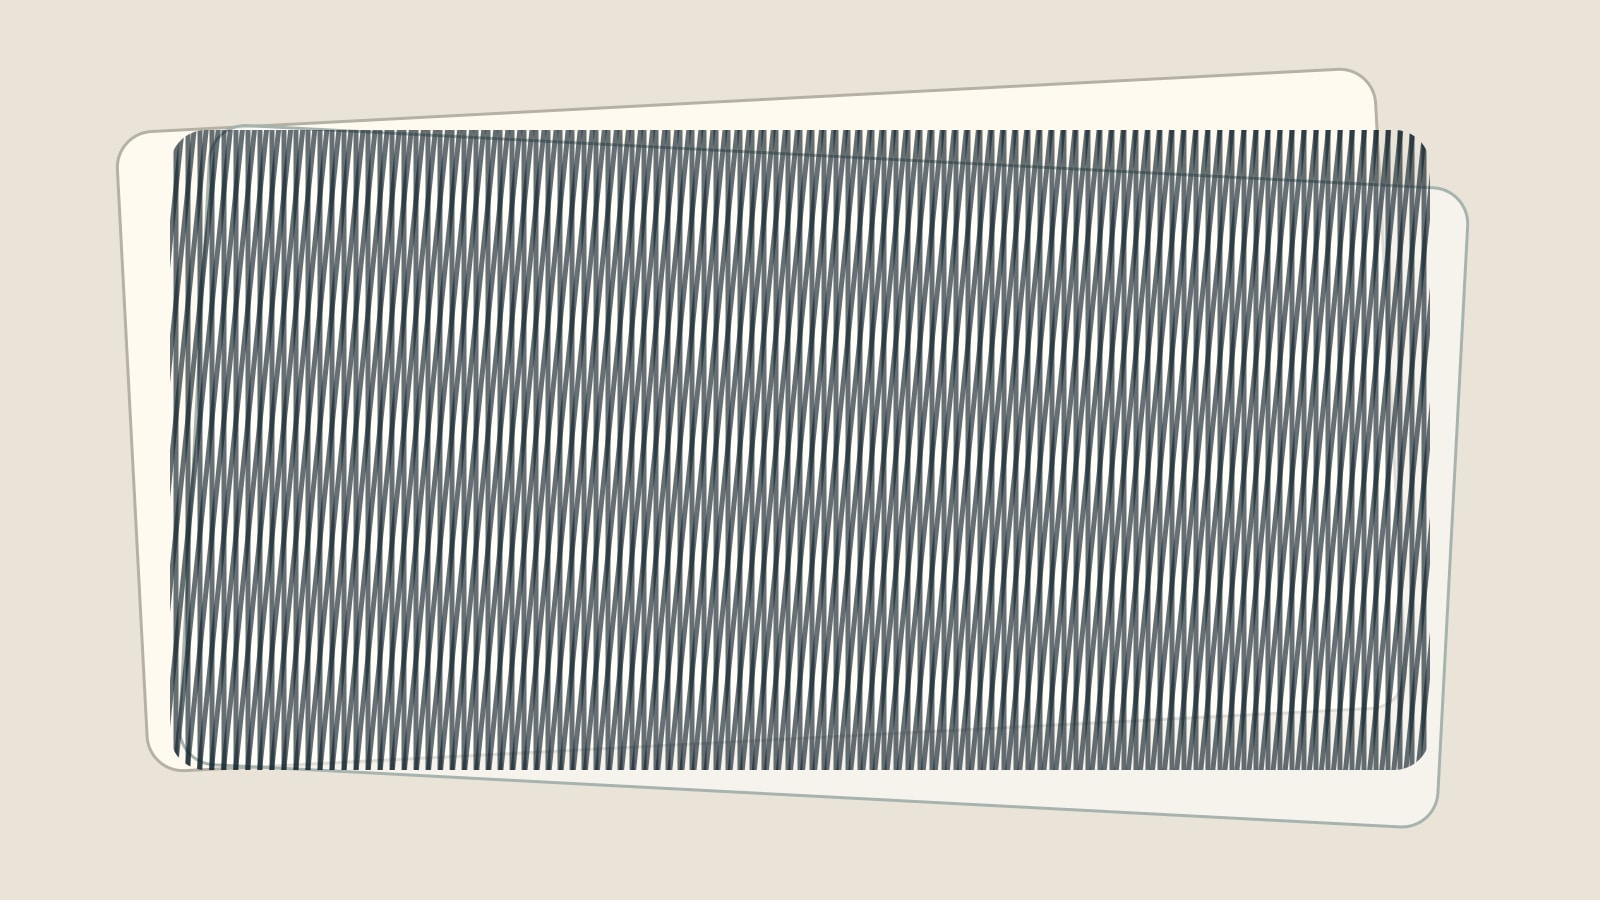
Two regular patterns can produce a third pattern that belongs to neither one. Look through overlapping fine grids and broad bands may appear. Move one layer a little and the bands shift much more noticeably than the lines you moved.
This is the useful starting point for understanding moiré. The broad pattern is not necessarily another mark printed on the surface. It can emerge from the relationship between repeated details. That is why a striped shirt, a scanned photograph and a picture of a screen can raise related questions without having the same fault or the same remedy.
A broad pattern made from small repetitions
Try an idealised example: two transparent sheets carrying evenly spaced dark lines. With the lines aligned, one set can hide behind the other. Turn one sheet slightly and the positions where the lines overlap change across the surface. Some regions look denser; others look lighter. The broad bands are the result of that changing overlap.
Our illustration uses a geometric construction to show this effect. It is not a photograph of a print job, a test of a particular machine or a precise simulation of a camera sensor. Its purpose is to make the relationship visible before introducing more complicated equipment.
The surprising part is the difference in scale. The component lines are fine and repetitive, while the new pattern can be large enough to dominate the picture. Looking for a large wavy mark in the original can therefore be frustrating: the mark may not exist there as a separate object.
A camera adds another pattern to the encounter
Nikon’s explanation of moiré and false colour describes a repeating subject interacting with the camera sensor’s pattern. Woven fabric and repeated architectural details are among its examples. The photographed result can contain a pattern that was not visible as such in the subject.
The same explanation distinguishes false colour: colour introduced into the image rather than present in the object or its lighting. Moiré and false colour can occur together, but the terms are not interchangeable. A broad dark band and a coloured patch are different observations, even if one capture produces both.
This matters when someone shows you a photograph of a suspected printing problem. The photograph is useful evidence of what that camera recorded. It is not automatically an exact account of what an unaided eye sees on the printed sheet. The capturing step belongs in the investigation.
For example, if a fine pattern changes when the camera’s position changes, that is a reason to examine the capture as well as the object. It is not proof that the object is perfect. More than one thing can be happening, and a photograph alone cannot settle every production question.
A scan can turn an existing print pattern into a new one
Printed tonal images can use patterns of small dots. If an already printed image is scanned, that existing pattern is being sampled again. Canon’s copying guidance explicitly identifies halftone dots as a possible source of moiré during scanning.
That gives a useful distinction between two files that may look similar at first glance: an original digital image and a scan of a printed version of that image. The scan can carry information about the printed dot structure as well as the subject. They are not necessarily equivalent starting points for another reproduction.
The Canon page also gives a setting for the equipment covered by that manual. It should not be lifted out of context and advertised as a universal fix for every scanner or copier. The relevant manual and the actual original matter. A menu label on one device is not a general law of imaging.
Resolution is not a single dial that fixes everything
When an unwanted pattern appears, “make it higher resolution” can sound like a complete instruction. It leaves several questions unanswered. Which stage is being changed: the original image, the scan, the photograph, the screen display or the output? Is the unwanted structure already recorded in the file, or does it appear only when that file is shown at a particular scale?
These are investigation questions, not a claim that every higher-resolution version will fail. The point is that a number without a stage is an incomplete diagnosis. Adding pixels after an artefact has been recorded is different from capturing the source differently in the first place.
The same caution applies to sharpening. A sharper-looking edge and a more faithful image are not always the same result. Nikon’s article discusses the trade-off between suppressing troublesome fine detail and retaining apparent sharpness in its camera examples. That is model-specific context, not a recommendation to blur every image that looks unusual.
Work backwards to where the pattern first appears
A useful comparison keeps the stages separate. Start with the source file if it exists. Compare its appearance with the printed object. Then distinguish what is seen directly from what appears in a scan, a photograph or a resized preview.
If the pattern is visible only in a phone photograph, keep that capture and describe the difference. If it is present in the file itself, changing the phone angle will not repair that file. If the only available file is a scan of a print, say so. These observations narrow the problem without pretending to identify the cause from one thumbnail.
For a printing enquiry, the useful material is the original file, the intended finished size and a clear account of where the pattern can be seen. A photograph can accompany them, with a note that it may add a capture effect. “It looks wavy” is a starting observation; “the waves are visible in this scan but not in this original file” is a much more informative comparison.
That approach also avoids a destructive shortcut: rebuilding a whole design before establishing where the unwanted pattern entered the chain. The right next step depends on the stage that needs attention, not merely the most noticeable symptom.
The pattern is a relationship
Moiré is memorable because it makes a normally hidden relationship visible. Two small, orderly repetitions can combine into something large and apparently unruly. Move, rotate or resample one part of the encounter and the visible result can change.
Once that idea is clear, the first question changes. Instead of asking only “Who put those waves there?”, ask “Which repeating patterns are meeting, and at which stage?” That question does not promise an instant repair. It gives the investigation a sensible place to begin.
Sources: Nikon’s manufacturer explanation and Canon’s specific copying manual, linked in context. The geometric illustration and staged comparison are original explanatory material, not evidence of a customer job or a physical production test.